If you are looking for a quick and easy project to knit, how about this red knit shawl and fans. What if I told you that with just a 150g skein of yarn, you’ll have more than enough to complete this project? Even better, if you prefer skipping the edging, 100g of yarn will be just right! This scarf is so lightweight, you’ll never want to take it off.
Autumn and Crochet mesh & fan shawl
As we transition into autumn, cooler days are starting to settle in, making it the perfect time to sit back, crochet, and enjoy a warm cup of coffee or tea. Take some time for yourself and dive into creating this “Relax Shawl.”
Choose your favorite yarn, and get ready to use this shawl year-round. It’ll be the ideal companion for a crisp autumn afternoon or a cool summer evening.
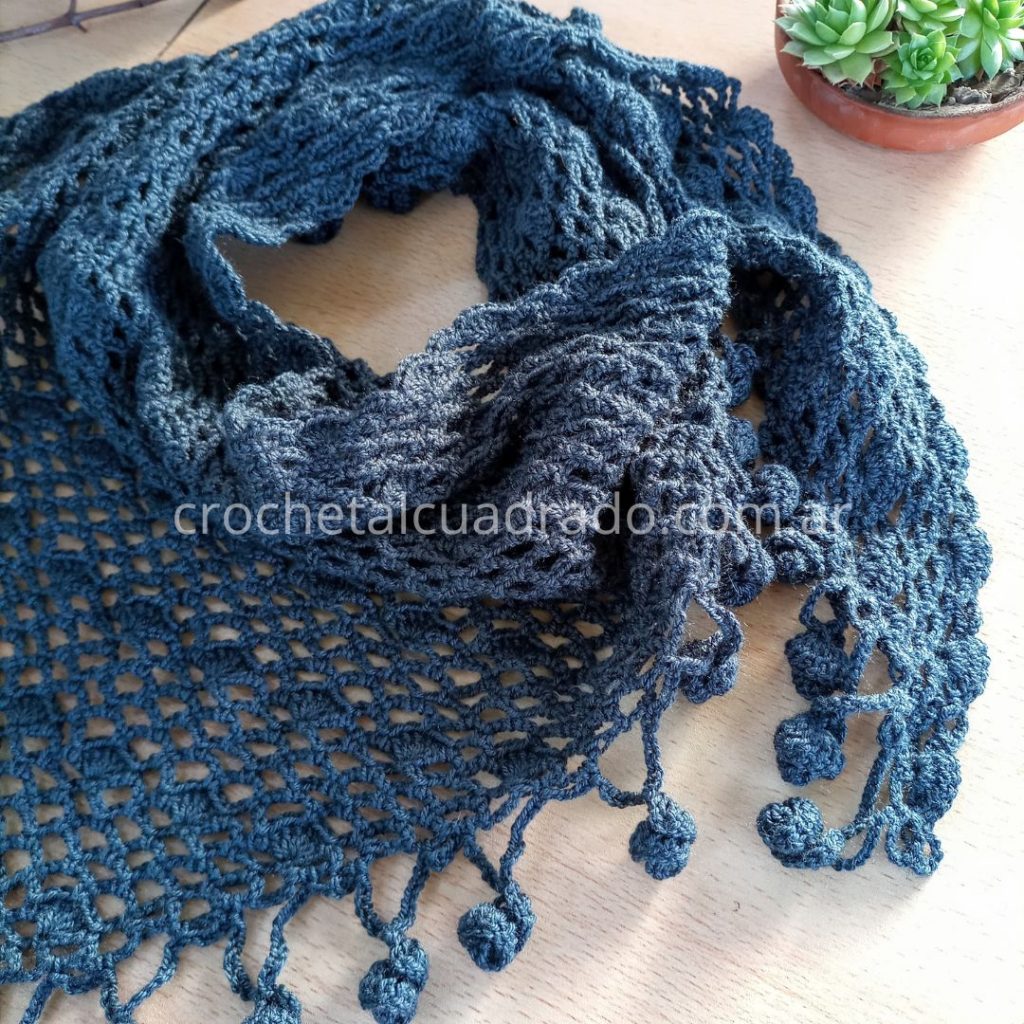
Important Notes
- 3 chains at the beginning of each row equal 1 double crochet
- 5 chains make an “arc”
- 5 double crochets worked into the same base stitch form a “fan stitch”
- The shawl is built from a repeated sequence of 7 rows, creating a pattern of arcs and fan stitches
- Using different yarns or hooks than those suggested can alter the final size of the shawl
- Each row specifies the number of arcs and fans you should have
Crochet mesh & fan shawl materials
- 120g fine acrylic yarn, silky finish (JOR-FRAN LHO)
- Hook size 2.5mm
- Scissors
- Stitch markers
Size
- Width: 140 cm
- Height: 50 cm
Stitches Used
- cad (ch) = chain
- mp (sc) = single crochet
- v (dc) = double crochet
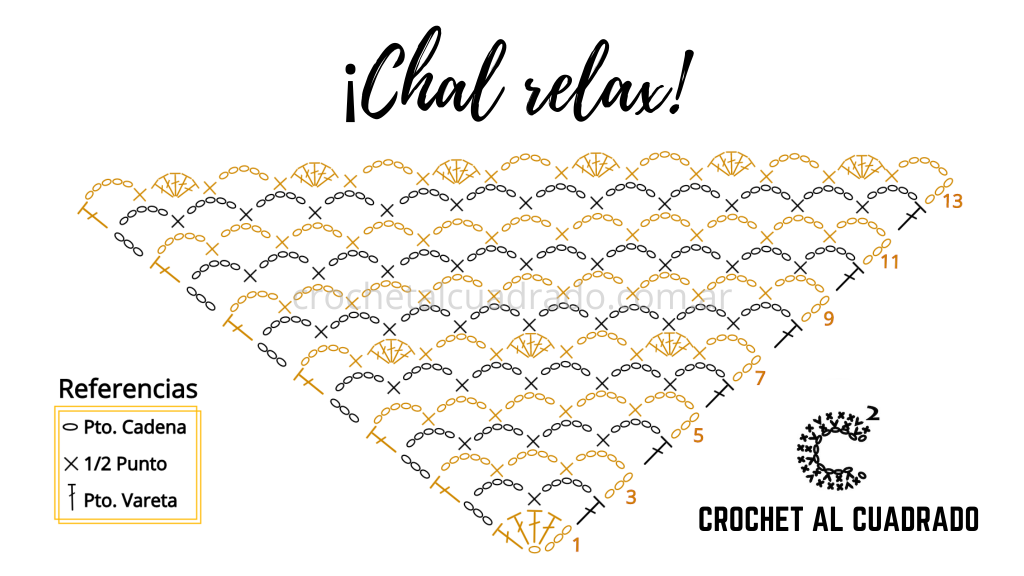
Diagram
Step-by-Step Instructions
- Row 1: Chain 4, 4 dc in the 4th chain from hook [1 fan]. Turn your work [1 fan].
- Row 2: Chain 8 (place a marker on the 3rd chain), sc in the center (3rd dc) of the fan from the previous row, chain 5, dc in the last dc of the same fan [2 arcs].
- Row 3: Chain 8 (place a marker on the 3rd chain), sc in the center of the 1st arc from the previous row, chain 5, sc in the center of the 2nd arc, chain 5, dc in the marked chain from Row 2 [3 arcs].
- Row 4: Chain 8 (place a marker on the 3rd chain), <sc in the center of the 1st arc of the previous row, chain 5>, repeat 2 more times, sc in the center of the 3rd arc, chain 5, dc in the marked chain from Row 3 [4 arcs].
- Row 5: Chain 8 (place a marker on the 3rd chain), <sc in the center of the 1st arc of the previous row, chain 5>, repeat 3 more times, sc in the center of the 4th arc, chain 5, dc in the marked chain from Row 4 [5 arcs].
- Row 6: Chain 8 (place a marker on the 3rd chain), <sc in the center of the 1st arc of the previous row, chain 5>, repeat 4 more times, sc in the center of the 5th arc, chain 5, dc in the marked chain from Row 5 [6 arcs].
You’re Doing Great!
- Row 7: Chain 8 (place a marker on the 3rd chain), <sc in the center of the 1st arc from the previous row, 5 dc in the sc from the previous row, sc in the next arc, chain 5>, repeat 2 more times, sc in the center of the 6th arc, chain 5, dc in the marked chain from Row 6 [4 arcs and 3 fans].
- Rows 8 to 73: Repeat Rows 2 through 7, <five rows of arcs and one row of arcs and fans>.
You can expand your shawl to any desired size or reduce rows if you’re using a thicker yarn. Be sure to finish the shawl with a row of arcs and fans.

Edging (Optional Border)
Without cutting the yarn, continue crocheting the edging as follows:
Chain 5, sc in the first arc along the edge, [chain 18, 4 dc in the 4th chain from the hook, <4 dc>, repeat 4 more times, chain 3, slip stitch in the same chain where you placed the last set of double crochets, chain 10, sc skipping one arc, chain 5, sc in the next arc] repeat from “[ to ]” along the entire edge. At the bottom, chain 5 and sc again at the end of the shawl. Continue with the other side of the shawl following the same “[ to ]” pattern up to the top edge.
Cut the yarn, hide, and secure the loose ends.
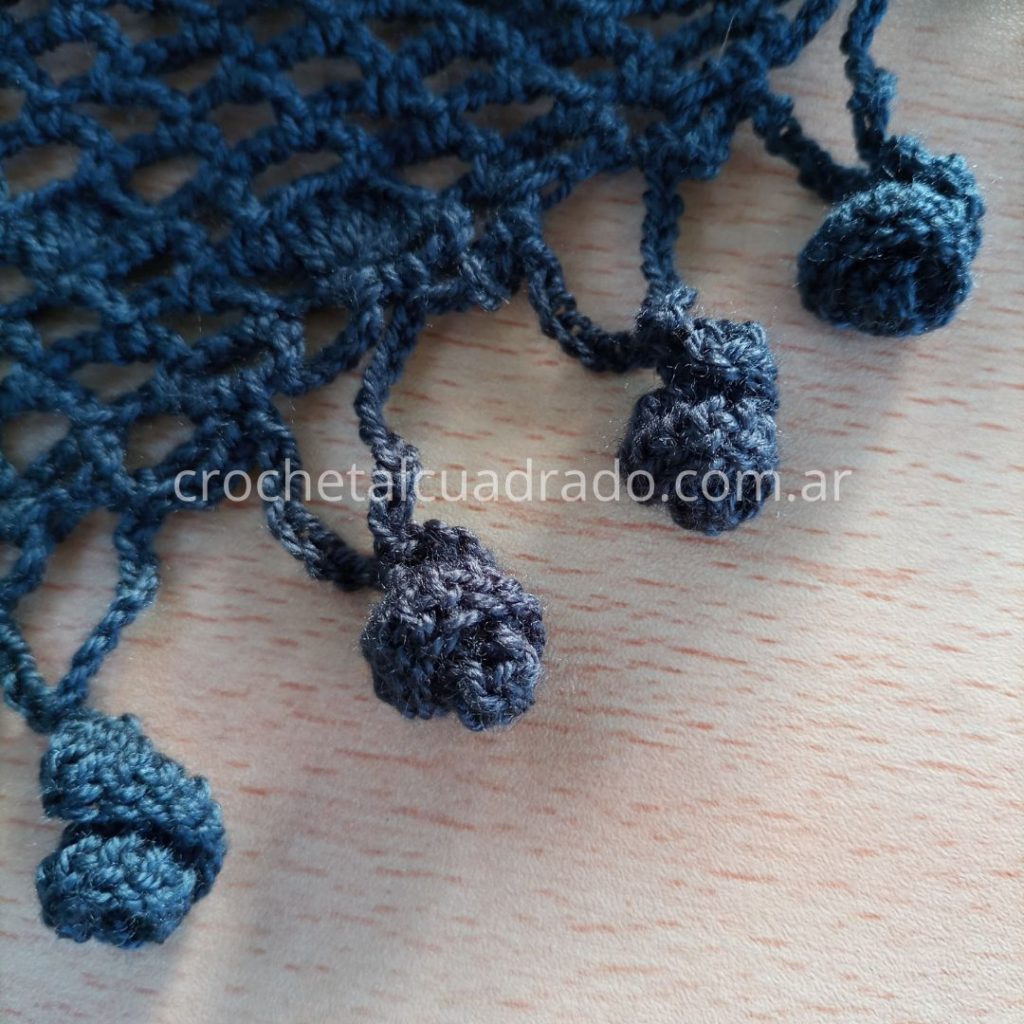
Edging Diagram
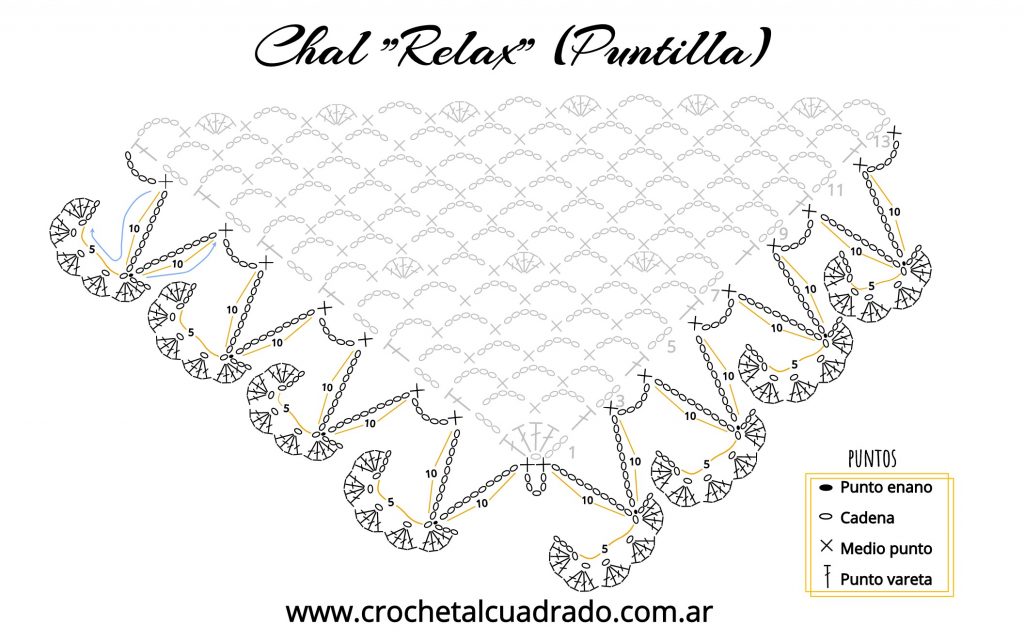
If you’d rather skip the edging, consider adding tassels to each corner instead. HERE’s a tutorial to make them step-by-step.
I hope you love this net and fan stitch shawl design. Thank you for your continued support!
If you have any questions about this pattern, feel free to reach out!
Share your work!
If you crochet this pattern, follow me on Instagram and tag your finished project! You can find me at @crochet_al_cuadrado or #crochetalcuadrado. I’d love to see your creations!
Like this pattern? If this guide helped or inspired you, feel free to share this page with your crochet friends to help the blog grow!💟
A hug and let’s knit! Love, Myriam.
Pinterest: https://ar.pinterest.com/crochetalcuadrado/
Instagram: https://www.instagram.com/crochet_al_cuadrado/
